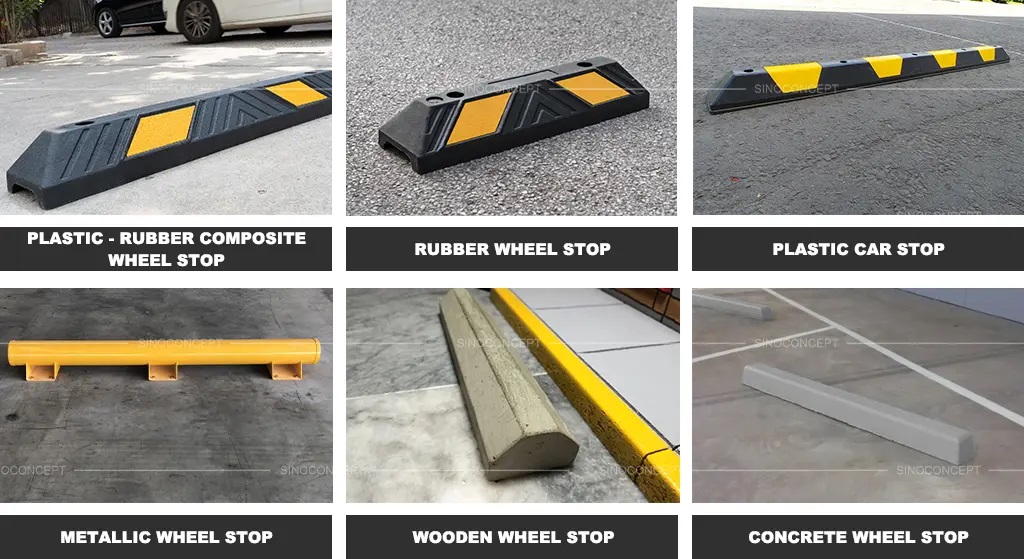
Wheel stops are a simple yet effective solution for enhancing safety and organization in parking areas. Understanding their features, benefits, and installation methods can help you implement them effectively, ensuring a safer environment for both drivers and pedestrians.
- What are wheel stops?
Wheel stops are physical barriers placed at the end of parking spaces to prevent vehicles from extending beyond designated areas. They help ensure proper parking and protect nearby structures and pedestrians.
- What materials are wheel stops made from?
Wheel stops can be made from various materials, including:
- Concrete: Durable and heavy, ideal for permanent installations.
- Rubber: Flexible and resistant to weather; often used in temporary setups.
- Plastic: Lightweight and often used in less demanding environments.
- How are wheel stops installed?
Installation methods vary by material:
- Concrete Wheel Stops: Typically anchored in place with concrete or rebar.
- Rubber/Plastic Wheel Stop: Often secured with bolts or can be simply placed on the ground, depending on the design.
How to Measure for Wheel Stops
Measuring for wheel stops is an essential step to ensure proper placement for safety and functionality in parking areas. Here’s a clear guide to help you measure accurately.
Tools You’ll Need:
- Measuring tape
- Marker or chalk
- Level (optional)
- Notepad and pen for notes
Step 1: Determine the Location
- Identify Parking Spaces: Decide where you want to install the wheel stops. Consider factors like traffic flow, accessibility, and safety.
- Check Regulations: Ensure that the placement complies with local regulations and any relevant zoning laws.
Step 2: Measure Parking Space Length
- Start from the Curb: Measure the total length of the parking space from the front of the space to the back, typically from the curb or wall to where the vehicle ends.
- Record Measurements: Write down the measurement for reference.
Step 3: Determine Wheel Stop Placement
- Standard Placement: Generally, wheel stop are placed 6 inches from the curb or wall. This allows enough space for the vehicle’s wheels to rest against the stop.
- Mark the Spot: Use a marker or chalk to indicate where the front edge of the wheel stop will be placed.
Step 4: Measure for Width and Height
- Width of Wheel Stop: Measure the width of the intended wheel stop. Standard widths are typically 4 to 6 feet.
- Height Above Ground: Ensure that the height of the wheel stop is compliant with safety standards. Most wheel stop are around 4 to 6 inches in height.
Step 5: Check Alignment
- Use a Level: If you’re installing multiple wheel stops, use a level to ensure they are aligned straight. This ensures a neat appearance and effective function.
- Adjust if Necessary: Make adjustments to your markings if any wheel stop are not aligned correctly.
Step 6: Finalize Measurements
- Double-Check: Go over your measurements one more time to confirm they are accurate. Ensure you have accounted for any variances in the parking surface.
- Note Any Obstacles: Take note of any obstacles (like light poles or trees) that could affect the placement of the wheel stops.
Step 7: Prepare for Installation
- Gather Materials: Collect the necessary tools and materials for installation, including concrete or anchors if required.
- Follow Installation Guidelines: Refer to the manufacturer’s guidelines for the specific installation process for the wheel stop you’ve chosen.
Conclusion
Measuring for wheel stops is a straightforward process that, when done correctly, can enhance parking safety and organization. By following this step-by-step guide, you can ensure accurate placement and effective functionality of your wheel stops. Remember to adhere to local regulations and consider safety for all users.

